• Welcome to H4O! For a reduced ad experience, please login or register with the forum.

THORparts SAS #2 project...

rascole

Well-Known Member
Messages
2,852
Location
Bellflower, CA
On my '89 1 ton, I switched the spring packs L-R and that fixed the sagging side. 30+ gallons of fuel on one side didn't help.
 

4speedfunk

Well-Known Member
Messages
4,250
Location
Tardville
Is it just me or does it look like the front axle needs to be moved forward quite a bit?

Its just you. Actually...I see what you mean, and I think its the angle of the camera. My shop is so small I cannot get further away to take a pic. Rest assured...this is stock wheel-base.

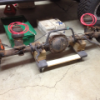
Yanked the rear axle yesterday...
attachment.php
attachment.php
attachment.php

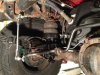
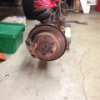
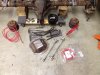
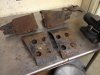
This gets new 5.13s gears. The airbags are getting modified. The brackets are getting cut-off for a spring-over set-up. Its getting new sway bar disco links, and also a rock cover. While I'm in there, I will check the pins inside the E-locker, and I'm also going to replace the o-rings on the ABS sensors (leaking). Then back she goes (after I swap the rotors to the correct sides). The truck gets new forward leaf hangers, and a pair of new GM T-leafs. New longer brake lines & vent tube. Stock shackles. Thats about it.
 

Attachments

  • 3fc381aa-ace7-407c-8c4a-28a8c52aa97e.png
    3fc381aa-ace7-407c-8c4a-28a8c52aa97e.png
    38.3 KB · Views: 1,054
  • 87521649-6ee8-4cd5-86fb-cbf39c8723dc.png
    87521649-6ee8-4cd5-86fb-cbf39c8723dc.png
    40.5 KB · Views: 1,044
  • 883ff8f2-0fa2-4b06-937e-edd721d08a1c.png
    883ff8f2-0fa2-4b06-937e-edd721d08a1c.png
    39.9 KB · Views: 1,156

MaxPF

AGNTSA
Messages
1,394
Location
The dark side of the globe
Its just you. Actually...I see what you mean, and I think its the angle of the camera. My shop is so small I cannot get further away to take a pic. Rest assured...this is stock wheel-base.

I just looked at it again. I think it's an optical illusion created by the large tire and lack of a front bumper. Makes it look like the axle is further rearward than it is.
 

4speedfunk

Well-Known Member
Messages
4,250
Location
Tardville
Thanks. You might be able to use many of the same basic parts and weld it to an H2. You would need some stiffer front coils, and of course...a front axle with a drivers-side drop and 8-lug hubs. I'm sure it would not be that simple but, with enough time and head-scratching, anything can be done. All of my focus has been geared toward the smaller H3 chassis and the Dana 44 axle. Frankly, the lack of any mid-size SAS options is why I started from scratch. If anyone had made something, I would have started with such a kit. But the Colorado/Canyon (and the H3) largely remains a custom-only platform when it comes to solid axle swaps.

I'm not very familiar with the H2, and I'm not sure how much of what I am doing here, would translate to the larger chassis. Starting from scratch is probably not cost effective because there are already quite a few SAS options for full-size GM trucks. The H2 is basically a full-size chassis & frame so you might be able to adapt a pre-manufactured, full-size SAS kit for much less money and headaches. Offroad Design is sort of the "go to" guys for full-size GM SAS work >>>http://offroaddesign.com/catalog.htm <<< and they have both leaf springs kits and coil-over kits that could possibly be adapted to fit the H2. No doubt it would require some further fab-time than a normal full-size truck but, adapting a kit would get you probably 90% of the parts without all the time-consuming trial & error I had to go through with the H3.

Solid-axle guys tend to say "to hell with the electronics" and that might be the area where you would have to get custom. Many full-size SAS builders don't take the time to retain the electronics...and nor does it make enough of a difference in performance to mess with! But on a Hummer...the electronics make a huge difference and they are truly part of the total package. To keep them functioning, you would have to add wheel speed sensors to whatever solid axle you plan to use, and that can get complicated. Its not impossible, it just takes a little extra effort to get it all figured out.
 

06 H3

a.k.a. "The Jackal"
Messages
9,506
Location
Meridian, ID
Cj, driver drop late model AAM 9.25 (basically the new dana 60) from a Dodge Ram. These work with the abs on late model Chevys. Guess what trucks use the same abs and diffs as h2s? Late model Chevys!!!

Google search it Chevy SAS guys run these all day and the abs wires run right into the dodge axle and your done.
 

4speedfunk

Well-Known Member
Messages
4,250
Location
Tardville
Sweet...good to know. I assume you would want to connect the dodge CAD to the wires that used to serve the IFS.? Otherwise....dump the CAD and go with manual locking hubs?
 

Panzer07

Well-Known Member
Messages
2,548
Location
Ontario, CA
If I keep my H3 forever like I envision, I think the solid axle is in my future. I'd do it now if I could justify the $$. [emoji2]


Mike

Justification is easy...no more having to get the strap...or winching necessary. Lol.
Maybe CJ has a credit program for solid axels lol. Won't hurt to ask. You pay first and the. You get the goods lol


Torres
 

High Five H2

Well-Known Member
Messages
1,627
Location
West Texas
The AAM 925 is basically just the solid axle version of the 9.25 IFS axle. I'm actually surprised it isn't used more often in the hummer world. I think pure performance used to do a SAS kit that used the 925 AAM. I get really excited about doing a SAS and find kind of obscure articles about it sometimes.
 

poncho1965

Well-Known Member
Messages
1,263
Location
Ridgecrest, California
Justification is easy...no more having to get the strap...or winching necessary. Lol.
Maybe CJ has a credit program for solid axels lol. Won't hurt to ask. You pay first and the. You get the goods lol


Torres

Hmm. Getting the strap is cheap. Have only had one major failure; my tcase. I'm a cautious wheeler. Sorry CJ don't want to hijack your thread. I hope SAS kits are in the future. I will do it if there are options to keep my '3 on the road! Would hate to end up with a Jeep [emoji16]


Mike
 

MaxPF

AGNTSA
Messages
1,394
Location
The dark side of the globe
Cj, driver drop late model AAM 9.25 (basically the new dana 60) from a Dodge Ram. These work with the abs on late model Chevys. Guess what trucks use the same abs and diffs as h2s? Late model Chevys!!!

Google search it Chevy SAS guys run these all day and the abs wires run right into the dodge axle and your done.

94-02 Dodge 3/4 and 1 tons used a driver drop Dana 60. It's a ball-joint, unit-bearing axle, but it's still a 60. Not sure if it has speed sensors on the hubs though.
 

4speedfunk

Well-Known Member
Messages
4,250
Location
Tardville
Over the weekend, I tore into the ass-end of the T project. I thought it would be a slam-dunk but as always...had a few complications.

The 09-up 8.6 10-bolts have larger pinion bearings than the 08-down, so that was a surprise. The bearings weren't that bad but, pressing them on/off sometimes compromises the cage that holds the rollers...so I felt new bearings were in order. Another factoid had to do with the gear set-up. The new 5.13 gears were a "5-cut" design verses the "2-cut" design that came factory. Long story short...the 5-cut gears require a looser set-up. After trying no less than 10 shims, (all day) I finally settled on a .030" pinion depth shim and set the backlash to .007". This gave me a perfect pattern and was quite a bit off from the .037" shim the gear manufacturer recommended. I also used a new seal, crush sleeve, and pinion nut. Pinion pre-load is 18 in-lbs with new bearings & seal.

There are several other things to address before the axle goes back under the truck. The airbags (previously installed by the owner) will be retained but, they will only be attached at the top. The bottoms will be loose and they will land on some poly-urethane cups...much like bump-stops. However, the bags can still be used to adjust ride height. After the gears were in...I shaved-off the stock bump-stop pads and spring perches, for the upcoming SOA mod. The perches are left loose until I fit the axle to the springs and set the pinion angle. Other new items are: U-bolts & plates, rock-cover, shock tabs, Spohn discos, new o-rings on the ABS sensors, longer brake lines & vent line, and an airbag hose kit (to replace the ones I screwed up during removal).

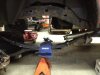
Next came chopping the stock hangers off the frame. Plasma cutter and some grinding makes this a pretty easy job. Having done this a few times...I prefer to leave the fuel tank in place. On the drivers-side, there is very little clearance between the frame rail and the fuel tank so you must be careful. I use a piece of 3/16" steel as a shield, and I stick it up between the frame and the plastic tank. This protects the tank from any stray plasma or grinding/cutting sparks. Trust me...its far easier than pulling the tank. BTW...I got some shock skids and front hanger plates available. Shoot me an offer if anybody wants these. New hangers got welded-on this morning, and I will have the truck on the ground later today...

attachment.php
attachment.php
attachment.php
attachment.php
attachment.php
 

Attachments

  • IMG_0620.JPG
    IMG_0620.JPG
    549.1 KB · Views: 1,001
  • IMG_0617.JPG
    IMG_0617.JPG
    403.5 KB · Views: 1,020
  • IMG_0619.JPG
    IMG_0619.JPG
    417.8 KB · Views: 1,018
  • IMG_0622.JPG
    IMG_0622.JPG
    486.5 KB · Views: 1,019
  • IMG_0623.JPG
    IMG_0623.JPG
    481.4 KB · Views: 1,022

4speedfunk

Well-Known Member
Messages
4,250
Location
Tardville
Well...been a few days. I got big red back on the ground....
attachment.php


The rear suspension is 99% done and ready to go. The axle itself got 5.13s and new pinion bearings...everything else looked good. When I re-installed it, I used some Daystar airbag cradles (an idea stolen from Kflips) and I must say, I'm very impressed with these. They basically allow the airbags to disconnect from the rear springs at full droop, so they don't limit the droop like they did when installed the standard method. I had to build some circular landing platforms to support the urethane cradles, and these are welded to the SOA spring plates. This works awesome with the SOA, and I'm excited to see it action. They work like bump stops, except they also allow you to adjust the ride-height at rest. A couple squirts of air, and she popped right up to a 1" rake.

The factory rear sway bar on the T is different from the SUV, and it rotates forward during droop. Depending on the droop...it can rotate all the way forward and crush the brake lines at the top of the differential. To combat this, I installed some longer sway bar links to return the bar to its proper position. These are Spohn Performance JK discos, with heims at each end....very nice quality.

The factory rigid brake lines along the axle were not long enough after I moved some stuff around, so I made some new ones. I also installed some longer flexible brake lines at the pumpkin, to allow for the increased droop. I retained the plastic clips that hold the rigid lines to the axle tubes. I installed a longer vent tube to the diff...but, I think the e-locker harness is long enough so I didn't mess with it. I then welded some new shock mounts to the tubes, and I am now ready to measure for rear shocks.

On my previous SASH3 build, I think I got my spring perches welded to the frame about a 1/2" too far aft. The bolts easily slid into the holes, and when I dropped it down off the jack...the shackles folded way back, and sat too flat. So on this one I really double and triple check the location, and I think nailed it. I had to rotate the shackles very far forward (with a crow-bar) to get the spring bolts installed, and this put the shackles at a much better angle when returned to normal ride height.

I used some brand new GM H3T leaf-springs...new U-bolts that were trimmed after installation...and it sits very nicely. I have given it the bounce test and it feels "right". FWIW...the springs do show signs of the back-wards bend at the end of them...even when brand new. This is normal but that doesn't make it right. The Speedy spring mod is the only good solution I've seen for this common issue. Hopefully the airbags will take some stress off the springs.

Lastly I fixed some screwed up stuff: I swapped the rotors left-to-right (they were on backwards) and I hooked-up the e-brake cable that was previously disconnected. One of the factory fuel tank skid bolts broke off in the frame, and I fixed that by breaking off three drill bits and an easy-out extractor in the same bolt! So I gave up and drilled and tapped a new hole right next to it.

I have a new diff cover but, I'm leaving it off for now. It will go to the powder coater along with some other stuff (cheaper to get it all done at once).

The T comes with an aluminum driveshaft, and I think this one needs lengthened. It has 4" or so of bare collar showing...and 3" of that is rusty, so I know its been over-extended from some time (from the Rancho kit). I will fix this after I'm done with everything else.

Pics coming soon.
 

Attachments

  • touchdown.JPG
    touchdown.JPG
    166.1 KB · Views: 1,020
Last edited:

RamRod

Well-Known Member
Messages
3,914
Location
AB, Canada
Moar pic's of the rear when you get a chance please! I have everything sitting in the spare room for my SOA Swap except the extended brake lines which are in the mail!

Can't wait to tackle this mod!

Keep that updates coming!


Sent from my iPad using Tapatalk
 

08H3

Well-Known Member
Messages
1,370
Location
United States
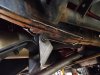
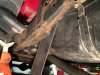
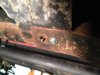
Looking good! The one question that I have had on this whole build has nothing to do with the drivetrain--but why is this truck so rusty underneath? Mine's not even close and I thought we had bad winters here.

I also didn't know the rotors were specific to each side. How are they different?
 

cgalpha08

"Like Nothing Else"
Messages
3,720
Location
Indianapolis, IN
Looking good! The one question that I have had on this whole build has nothing to do with the drivetrain--but why is this truck so rusty underneath? Mine's not even close and I thought we had bad winters here.

I also didn't know the rotors were specific to each side. How are they different?
Take it from me, I used to live a little south of geno in NY. They salt the roads up there extra thick and more often than here. Doesn't matter if the temperature is below where the salt makes any impact....they pour it on. Snow plow truck is driving....it's salting. IMO aside from some sort of rust proofing, washing the car, especially the underneath, as soon as a dry road day pops up.
 

clickclickboom

Well-Known Member
Messages
149
Location
indianapolis
Pictures don't do this thing justice, it is big.

Too bad it wasn't mobile to snap a pic next to my stock T when I was down there.

Cj is doing some good looking work.
 

4speedfunk

Well-Known Member
Messages
4,250
Location
Tardville
Answers:
Rust? Winters in western NY, I guess. Its played hell with me from the start. Most of the brake lines are fused, and I replaced many of them simply because I had to destroy them to get them loose. I am spraying new work with black paint, and normally I would detail the entire frame & suspension but, on this truck...its a huge job. The paint is for protection...not to make it pretty. Maybe when I'm done, somebody else will put it on a lift and hit the entire underside with wire wheels and flapper wheels, then put on a nice coat of paint to make it purdy and try to stave off the rust. But, I ain't that guy!
Rotors? Stock rotors are the same LH & RH. But drilled & slotted rotors need to be installed so the slots channel the heat and pad dust outward as the rotor spins. For this reason slotted rotors are directional. Its a very minor issue but, I mention because I don't think people realize that when they buy slotted rotors.
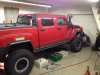
Big? Hell yes. This thing is an absolute BEAST. I will need to air down to 10 psi to clear the header of the door.

Pics:
Sorry for the delay...its hard to "build" and "document" in the same time frame. This is being done "on the ground" and I don't have a fancy lift...so the pics are hard to take.

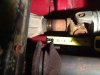
#1 shows the new fuel tank skid bolt I had to add (old one is rusted in place). Next to it is my super high-tech locating pin (the remnants of an easy-out broke off in the original bolt) -LOL...
attachment.php


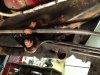
#2 shows how much ground clearance the SOA gives you with 37" tires...YIKES!...
attachment.php


#3 shows the cantilever driveshaft yoke problem that happens with the SOA. A one-inch reveal like this is normal with the SOA, and you can also see how the yoke has been previously extended a couple more inches from when the Rancho was installed. I will polish the seal-surface of the yoke, lengthen the driveshaft, and return it to its stock position. I would like to see 1" to 1-1/2" of shiny yoke showing when I'm done...
attachment.php


#4 shows the new p.s. forward spring mount...
attachment.php


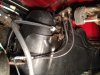
#5 shows the new (and longer) brake lines and diff vent....
attachment.php


#6 shows the p.s. of the axle...shock mount, air-bag, and SOA with new "MADE IN MEXICO" GM springs. The ABS lines are still loose and will get zip-tyed to the shock bodies. Most of the time, the factory rigid brake lines can be re-used but, on this the truck the rust required me to destroy them to get them loose. I re-used the original tabs where the rigid brake line met the flex. These were cut-off from the factory bump-stop plates, and re-welded to the tubes which retains a "similar-to-stock" layout. At the far right, you can see the ABS sensor mounted to the axle tube. These were removed, and the small O-ring on the sensor tip was replaced with a slightly fatter version, to seal up the weeping issue that these often have...
attachment.php


#7 shows the perfect shackle angle I was able to obtain...and the slight re-curve that H3 springs are famous for...
attachment.php


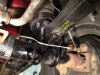
#8 shows the sway bar disco, and the proper angle it needs to be at rest. Look closely at the far right, and you can see how the sway bar will rotate forward at full-droop and crush the brake lines against the pumpkin. I have relocated the lines, bent the bracket forward, and lengthened the sway bar links to try to prevent this from happening. Also you can see the "slick-as-hell" air bag rig. The top is attached to the frame but, the bottom is loose and sits in a polyurethane cradle. As the suspension nears full-droop the bag is free to rise up off the cradle and thus doesn't limit the droop. When the suspension returns to ride-height...the bag settles back into its cradle, and compensates for any load that might be in the truck bed. Truly genius....
attachment.php
 

Attachments

  • geno rear-1.JPG
    geno rear-1.JPG
    124.9 KB · Views: 1,040
  • geno rear-2.JPG
    geno rear-2.JPG
    113.3 KB · Views: 1,093
  • geno rear-3.JPG
    geno rear-3.JPG
    100.3 KB · Views: 1,099
  • geno rear-4.JPG
    geno rear-4.JPG
    108.3 KB · Views: 1,023
  • geno rear-5.JPG
    geno rear-5.JPG
    104.8 KB · Views: 1,038
  • geno rear-6.JPG
    geno rear-6.JPG
    141.5 KB · Views: 1,144
  • geno rear-7.JPG
    geno rear-7.JPG
    107.9 KB · Views: 1,081
  • geno rear-8.JPG
    geno rear-8.JPG
    139.1 KB · Views: 1,043
Last edited:

RamRod

Well-Known Member
Messages
3,914
Location
AB, Canada
Would you say that the airbag/Daystar combo would be better that some air bumps?

The only complaint I have heard about the daystar setup is the "clapping" that the cradle and bottom of the air bag make when they reconnect. I am sure you could find a material to put in there to get rid of the sound if that's the biggest problem with it


Sent from handheld smoke signal device
 
Top