• Welcome to H4O! For a reduced ad experience, please login or register with the forum.

Getting ready to install seat warmers

Jrkilburn

Well-Known Member
Messages
77
Location
Maryland
Installing a decent quality hi lo set in my H3T the weekend after next. I have the tools required but have never removed a seat cover and I am searching for some help via video or pictures for the H3.

Also any suggestions on where to grab power from are welcomed as well. I am skilled in wiring and mechanics so that's not the issue, just looking for tips to avoid any pitfalls in the process.

The seats are cloth and yes I need heated seats for keeping the wife's butt warm when going on winter road trips ( my seat is being done just so its symmetrical, lol)

Thanks in advance for assistance and advice.


Sent from my iPad using Tapatalk
 

Jrkilburn

Well-Known Member
Messages
77
Location
Maryland
I certainly will. I haven't found any pictures of a H3 seat torn down yet so it may have value in the long haul to someone.
 

Panzer07

Well-Known Member
Messages
2,548
Location
Ontario, CA
Some of here sure We'll appreciate that review and write up of this...I know I will since I have heaters as well...and they will need replacement eventually.


Torres
 

HIROLA

Well-Known Member
Messages
118
Location
NOVA
I replaced my seats long ago with Katzkins. I have lots of pictures and a long write up. It I not hard to take the seat apart and take off the fabric. Since you are just dealing with the front seats, below is my write up for those. I didn't do the heated option because I read somewhere that it interferes with the passenger airbag sensor somehow??? Let me know if you have any questions. Also as a side note, use the below steps at your own risk!


Tools needed:

  • 18mm tall socket for the 4 nuts holding the seat to the floor
  • 13mm socket for 4 bolts holding together the top and bottom seats
  • Small flat head screw driver to assist in prying
  • Long flat head screw driver to assist in prying
  • Small Phillips head screw driver
  • Torx T-20 for the adjustment handle
  • Torx T-45 for the seat belt latch
  • Small hex wrench to remove head rests
  • Hog Ring Pliers
  • 22 Hog Rings
  • A helping hand to provide beer and head rest assistance
  • Pliers
  • Flash light – to help see in the dark spaces…
  • Box cutters or a knife of some sort
  • Small hand towel
    The front driver seat leather installation is very similar to the front passenger seat install.
    Step 1: Remove the seat from the truck. Slide the seat all the way back (pull up on the handle under the seat and push back). You will see two 18mm nuts. Remove them. Now, slide the seat all the way forward. There are two black plastic pieces which are covering the other 18mm nuts - these plastic pieces just pop off. Using your fingers, or a screw driver, just pry the plastic up. Now you can unbolt the 2 remaining 18mm nuts that are holding the seat in. In my 06 with no heated seats, I had one connection which needed to be unclipped from the bottom of the seat. To do so, I reached my hand under the seat from the rear. You have easy access to the connectors. Just squeeze at the ends and it will release the latch which will allow you to unplug them.
    Step 2: Drag the seat out of the front door. For the most part, it is easy to handle (much easier than the back of the back seats). Bring it to the area where you are going to work.
    Step 3: Remove the side plastic on the bottom seat. Lay the seat on its back so that the bottom of the seat is exposed. The plastic piece is held in by the lumbar adjustment knob, seat back adjustment handle, two Philips head screws and two clips. On the side is the seat back adjustment handle. Using a T-20 torx head, unscrew this part and put it aside. Also on the side is the lumbar adjustment knob. Using a small hand towel, wrap it around the knob and pull. It comes off with a little force. Now, find the two Philips head screws located on the bottom of the seat at the front and back corners on the side of the plastic piece. Unscrew the screws and pull at the middle of the plastic to release the clips.
    Step 4: Unscrew the seat belt latch. This is held in by a T-45 torx screw. There are two wires that will keep the seat belt latch attached to the seat. Once you release the fabric from the seat, this seat belt latch will fit through the hole in the fabric.
    Step 5: Remove the plastic on the rear of the seat back. This is held in by 2 normal clips, 2 “super” clips and 2 hooks of sorts. Start on the lower side of the seat to release one of the normal clips by pulling back on the plastic. Then head to the top of the seat. You can push the fabric around so that you can see under the plastic to find the “super” clips. A flashlight helped here. Using the long flat head screw driver, stick it in between the plastic and the fabric. You are aiming for the metal clip to push in on it and pry out. Once you get that one, move to the other side of the top and remove the other “super” clip. Next, on the other side of the seat that is still attached, head to the bottom of the side and remove the last clip by pulling back on the plastic. Last, there are two hooks that hold in the bottom. Tilt the plastic seat backing so that you can see them and see how they are connected to the metal frame. You can use a flat head here to assist in releasing these but you should just be able to move the plastic around to release the hooks. The plastic seat back should be removed at this point - set it aside.
    Step 6: Unhook all of the fabric from the seats. The fabric is hooked into the metal frame. Just pull on the plastic channels and release them from the metal. Do this on both the top and bottom seat.
    Step 7: With the face of the seats pointed towards the floor, point your attention to where the seats come together on the sides. You will see a plastic cover on top of two 13mm bolts. This plastic piece will need to come off. However, first, you need to unclip the fabric from this. Follow the fabric of the top seat around the bottom side of that plastic part and you will see a black plastic plug. Pull this puppy out. Pliers and a screw driver helped me here. Once removed, the fabric will come away and you will be able to remove the plastic cover. Repeat the above for the other side of the seat.
    Step 8: The plastic cover is held on by 3 little pieces of plastic that overhang on the metal. Just bend the plastic cover off the sides where the plastic overhangs are. Using a 13mm socket, remove the two screws. Repeat this step for the other side. The two seats are now only held together by the cord for the lumbar adjustment. I did not remove this but having the seats apart like this did assist in making it easier to assemble the seats.
    Step 9: Start with the bottom seat. The fabric is still held on by hog rings and a strap. 11 rings on the top and a strap on the back sides. You can remove the foam from the seat base. This will allow easier access to remove the rear strap. Work on the rings holding the fabric to the seat top. There are 3 rings at the front, and 4 on each side. Either cut them or pry them apart at the seams. Once these hog rings are removed, the fabric should come off the seat.
    Step 10: Install the new leather. Place the leather on top of the bottom seat to ensure a proper fit. Once things look good, start clamping in new hog rings starting with the front. Clamp 3 rings in the same position that you took them off. As you work, keep lining the leather up so that it will look pretty. Work your way down the sides clamping the leather to the foam with 4 rings on each side. There is a Velcro strap that replaces the 4 hog rings at the rear. Just stretch this strap around the back of the seat and Velcro it on the bottom side of the seat.
    Step 11: Place the foam back on the seat base. Line everything up and make sure it fits back how it came off. You will now stretch the leather around the underside of the seat and clip each of the plastic channels onto the metal frame in the back. Do this for all the sides except for the one with the seat belt.
 

HIROLA

Well-Known Member
Messages
118
Location
NOVA
Step 12: Once the leather is clipped down (except for the side with the seat belt) you need to cut your hole for the seat belt to slide back through. Line the leather up as if it were clipped on. Put the seat belt in place and using a box cutter or knife of some sort, cut a diagonal slit up the leather (refer to the old fabric for some inspiration). Start small and make it only as big as you need to in order to fit the seat belt latch through. Once you can fit the seat belt latch through, do so and reattached the seat belt latch with the T-45 screw. Then follow up by clipping that leather side onto the bottom of the seat frame. Slide the seat belt latch through the little elastic loop on the top side of the leather.
Step 13: On the other side, you need to cut holes for the lumbar adjustment knob, back seat adjustment handle and the two clips for the plastic cover. Since the leather is tight, you should see the bulge where the adjustment handle shaft is and where the lumbar shaft is. Go ahead and just cut an ‘X’ on top of them so that they will fit through the leather. For the clip holes, Take the plastic cover and line everything up. That will give you an idea as to where it will clip in on the metal seat bottom. Reach you hand under the leather and find that hole – it is rectangular. Line things up and puncture the leather with a small Philips head screw driver so that you know you are in the right spot. Now cut out a hole in the shape of a long ‘X’ to match up with the rectangle. Do this for both clips.
Step 14: Reattach the plastic cover on the side of the seat. Line up the lumbar hole, adjustment hole, the clip holes and the two screw holes on the bottom. Start with screwing in the top screw to the bottom of the seat using the Philips head screw driver. Then screw in the bottom screw. Now press where the clips are on the side until you hear it clip into place. Once everything is secure, reattach the adjustment handle. Using the T-20 bit, screw it back on – not too tight. There is a “key” on the shaft and the hole in the handle. Line this up (it is straight forward). To reattach the lumbar knob, just line it up on the shaft and push. Again, very straight forward. If I remembered all of the steps properly, the bottom seat should be complete at this point.
Step 15: Finish removing the fabric from the seat back. At this point, the fabric should be unclipped from the metal frame in the back of the seat. It is now being held on by the head rest. To remove the head rest, take a small hex wrench and stick it in the small hole on the inside of the plastic base that does not have the latch. Once it fits in, push in on it, push in on the latch on the other side, and pull up on the head rest. It comes out without any hassle.
Step 16: Now, remove the stalks that are still in the seat. From the rear of the seat where you see the foam, find the stalks. There is a little plastic clip that you will need to push in on (it only needs a light touch). While pushing in on the clip, push up on the bottom of the stalk to feed it through the seat top. You can pull it out once you get it moving a little. Do the same for the other side. Keep track of which stalk came out of where and how they went in.
Step 17: Remove the hog rings from the fabric and the foam. Similar to the bottom of the seat, there are 3 holding in the top (closer to the head rest) and 4 on each of the sides. Once removed, the fabric should just come right off.
Step 18: Attach the new leather to the foam of the seat back. Line things up and start clipping the hog rings from the top 3. Then do each of the sides. Once the leather is clamped down, wrap the leather around the foam and hook it onto the metal frame using the plastic channels.
Step 19: At this point, the leather should be fully attached to the foam. Cut holes for the head rest. To find where the holes need to be cut, take a long screw driver and stick it from the foam side through to the top. There is a small hole that the screwdriver will find. Then, using your hand, push down on the leather to feel the driver and where you need to make your slit. Take the plastic head rest stalk that you pulled out from before and attempt to stick it into the new slit. You will see that it won’t fit at first, so cut the leather as need be until the stalk fits down into the seat and clips in. Repeat for the other side.
Step 20: Reattach the two seat pieces together. Take the top section and line it up with the metal hinges on the bottom seat. Using the 13mm bolts, screw the 4 of them back in to hold the seats together.
Step 21: Reattach the plastic bolt covers on both sides of the seat. Just put in place and then push down so that the plastic latches will reach around the metal and hold it in place.
Step 22: Attached the leather for the back of the seat to the plastic covers. Stretch the leather around the plastic cover and make a mark for the plastic plug. Do so by using a small Philips head screw driver to puncture the leather where the small hole is in the plastic. Now, using a knife cut the hole to be a little bit bigger in order to fit the plastic plug. Once complete, attach the leather to the plastic cover using the plastic plug. Repeat for the other side.
Step 23: Reattach the large plastic backing to the seat back. You will be required to cut 4 more holes in the leather. First line things up and take note of where everything will fall into place. Using the old seat cover for inspiration on where to cut, start with the bottom of the back. Cut out two circles/boxes/holes (whatever shape you would like) a little larger than the size of the two black hooks. These will be cut at the bottom of the seat backing so that the plastic can clip onto the metal frame. You can see the holes in one of the attached pictures. Next, find the holes on the side of the seat. You will actually cut into the leather on this one and not just the fabric holding on the plastic channels. It will be a little bit off of the seam on the leather side where the cut will begin. There is a rectangular metal hole in the seat which is what you want to line up and cut the leather for. It is on both sides of the seat. Do this carefully so that you don’t cut in the wrong place. If you do, it could potentially be seen when everything is complete. Using the small Philips head screw driver puncture the leather to assist in lining things up. Once the 4 holes are cut, reattach the plastic backing. Start with the bottom. Then clip in one of the sides, then the top two and then the other side.
Step 24: The seats should be together by this point. It is now time to install the head rest. As mentioned in the previous write-up about the passenger seat, I used a helper to assist me in putting this head rest on. One person squeezes the foam and the other person fits the head rest on. It takes a little bit of time to work it, but it will go on. Then, to clip the head rest on, you need to squish the front and back together and then fit the plastic channels together so that they hold everything in place on the underside of the head rest. This took a while because the headrest was technically not the correct size.
 

HIROLA

Well-Known Member
Messages
118
Location
NOVA
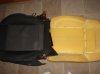
A few pics
 

Attachments

  • DSC01294.jpg
    DSC01294.jpg
    384.2 KB · Views: 341
  • DSC01306.jpg
    DSC01306.jpg
    256.2 KB · Views: 336
  • DSC01307_resized.jpg
    DSC01307_resized.jpg
    138.8 KB · Views: 305

SuperBuickGuy

Well-Known Member
Messages
3,403
Location
Woodinville, WA
nice write up, I've put a half dozen seat heaters in various cars for my wife, and the one thing I've found is you will never get the seat fabric/leather to lay back flat... it's really not a big deal as long as you only remove the C clips that are absolutely necessary to install the heating pad. In short, don't completely remove the seat cover, only remove the center. Also, have a really good pair of wire cutters or even small bolt cutters makes removing the C clips pretty easy. Remember to also remove the rest of the wire when you cut it.

And finally, pay attention, the last heaters I installed, I planned them for another vehicle so I pull them out of the box months prior - and when I put it together, I blindly put two bottom heating pads in the seat. The problem is there's a temp sensor that must be in one of the pads.

There is little difference between cheap and expensive heaters... the biggest price difference is you get a rheostat on/off switch with the more expensive ones. And finally, buy from a reputable place (I buy from Summit) because if they don't work, the $10 or so dollars you saved will seem pretty silly.
 

rsc

Well-Known Member
Messages
1,087
Location
Tulsa
Thanks for posting that HIROLA, I was just about to look for a link to your Katzkins seat re-cover thread. They look great.
 
Top