• Welcome to H4O! For a reduced ad experience, please login or register with the forum.

H3 Move, rear bumper

Stoic Bluejay

Well-Known Member
Messages
81
Location
The ILL
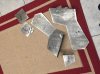
This past week my Move rear bumper came in. I spoke to customer service a few time about the "wings" portion to replace the rear side portion that meets up to the bumper. Customer service was very personal and positive all around. I requested the two light holes be cut out for my Rigid Industries flush mount Dully D2. When I received the box I was surprised how difficult it was to inbox it. I would say it took and hour or so and my wife wasn't happy with the mess all over the kitchen table. Lol

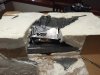
Overall the bumper quality is up to my expectations. The holes are slightly bigger then needed for the RI Dully D2. Took it to the shop today to have it welded and the holes in the bumper decreased to fit the Dully D2. I should have it back within a few days and I'll post the pics of it welded. Next it will go to Line-X with the rest of my H3. Of course I'll post pics of the completed job.
 

Attachments

  • image.jpg
    image.jpg
    698.3 KB · Views: 2,469
  • image.jpg
    image.jpg
    756.8 KB · Views: 1,442
  • image.jpg
    image.jpg
    661.5 KB · Views: 2,197

Stoic Bluejay

Well-Known Member
Messages
81
Location
The ILL
For now the spare is staying. I like the look and certainly don't have the garage clearance to throw it on top of the Gobi roof rack when it gets here. Lol
 

Stoic Bluejay

Well-Known Member
Messages
81
Location
The ILL
Ok so here's the overall view. I've got several others photos but they don't see to want to load right now. Plus not sure why there is a double of this image. Lol the lights fit in great with an extra half inch added to each side of the hole where they are to be mounted too. It's got good weight to it but lighter then I expected overall.
 

scoreh3

Well-Known Member
Messages
1,024
Location
SoCal
Very nice looking bumper . Are you going to run 2 D rings ? If so , how are you going anchor the left one ?
 

Stoic Bluejay

Well-Known Member
Messages
81
Location
The ILL
Good question. I haven't dug into how to anchor the other D Ring yet. Open to ideas. Of course still have to purchase another D ring.lol
 

scoreh3

Well-Known Member
Messages
1,024
Location
SoCal
Ok somewhere I saw where someone used a couple links of chain and anchored the back of the new D ring ( useing a factory H3 d ring) on the left side to the frame . Maybe someone else remembers it too and can repost it here . It was a really easy set up . I don't remember if they did it to a Thor or ARB bumper , but the 2 D rings looked really nice on the rear .
 

JPaul

Well-Known Member
Messages
2,436
Location
Way up north, UT
I think someone else also figured out you could use the d-ring bracket that bolts to the frame on the passenger side. I imagine you could also just fabricate your own bracket for the driver's side from some plate steel.

Sent from my SM-N910T using Tapatalk
 

scoreh3

Well-Known Member
Messages
1,024
Location
SoCal
It was a real easy set up as I remember . A flat backing plate with a couple of links of chain welded to it and then the chain was bolted to the frame .
 

4speedfunk

Well-Known Member
Messages
4,250
Location
Tardville
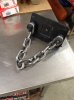
1. Drill the bumper.
2. Install a tow-hook with 3" long bolts & nuts on the backside.
3. After you get the nuts tight, get a piece of chain and trim it to the appropriate length.
4. Slide one end link over the protruding bolt, and put a washer and nut on it.
5. Then loop the chain around the vertical support of the frame (above the tow bar on drivers-side).
6. Slide the other end link onto the other protruding bolt, with a washer and nut.

At this point, the chain will be slack and rattling. Then you simply tighten the nuts (alternate back & forth). The idea is that as you tighten the chain...it becomes taunt and eventually totally rigid. I first came up with this and shook my head at how simple it was. I thought it was the most redneck thing ever. But, after five years and countless yanks...the chain and tow-hook remain rock-solid. You can jerk on it as hard as you want to. The backing plate is not necessary...just use some thick washers. Here's a few pics that describe what I'm talking about....

attachment.php
attachment.php
attachment.php
 

Attachments

  • tow-hook-1r.jpg
    tow-hook-1r.jpg
    273.6 KB · Views: 2,148
  • tow-hook-2r.jpg
    tow-hook-2r.jpg
    274.7 KB · Views: 2,152
  • rear101.jpg
    rear101.jpg
    753.3 KB · Views: 3,194

Stoic Bluejay

Well-Known Member
Messages
81
Location
The ILL
Awesome! Thanks for the info and photos. H3 still at Line X. Hopefully get it picked up by the end of the weekend. They line-Xed the rear bumper and went to install it and it didn't line up. The bumper is reportedly too short and would beat against the body. So now I've got a good amount of $ sunk into it and can't put it on yet. Going to have to take it to a fabricating shop I guess. I sent Move an email with photos on Thursday with no reply yet.
 

derian06

Red Rockett
Messages
1,866
Location
Madison, AL
Awesome! Thanks for the info and photos. H3 still at Line X. Hopefully get it picked up by the end of the weekend. They line-Xed the rear bumper and went to install it and it didn't line up. The bumper is reportedly too short and would beat against the body. So now I've got a good amount of $ sunk into it and can't put it on yet. Going to have to take it to a fabricating shop I guess. I sent Move an email with photos on Thursday with no reply yet.

Did they weld it while it was attached to your truck? You're supposed to use your truck as a jig.
 
Top